Tip of the Month - November 2018: Vision Accessibility Features for iOS Phones
The Apple operating system, known as iOS, provides a complete suite of accessibility features for users with visual impairments. In this guide, we can show you what is possible with these devices to help support visual difficulties and teach you the basics.
To access these features you need to do the following:
1. Open the settings menu by selecting the settings icon on your device’s home screen.
2. Select General
3. Select Accessibility
4. At the top of the Accessibility setting you will find the Vision setting.

Within this setting, you have access to the following features listed below. Depending on what model or Apple device you are using, some features may not be available.
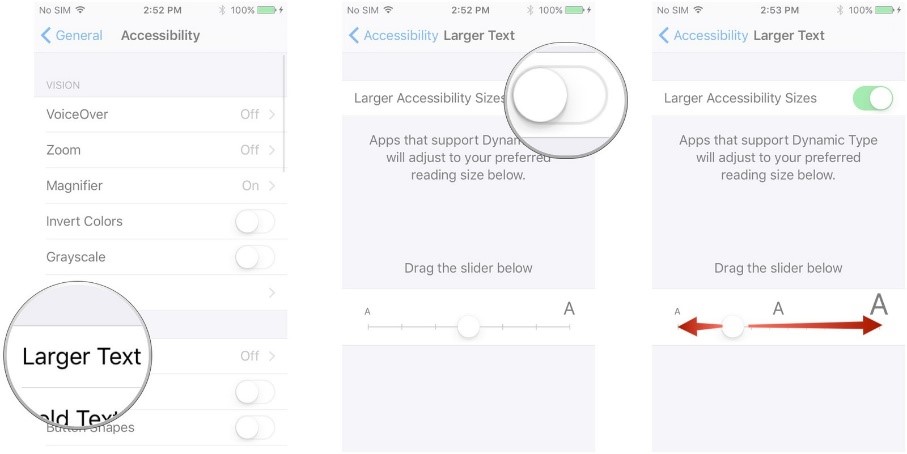
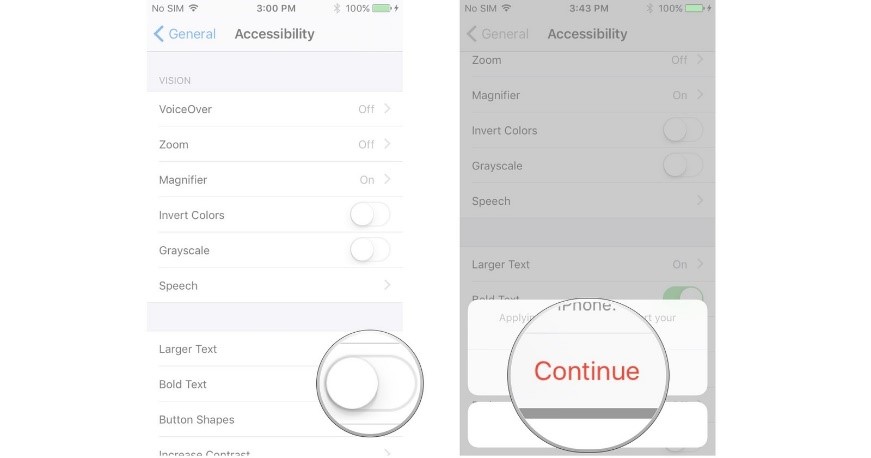
Font Adjustments:
Within this setting you are able to adjust the Size of your text, or make it BOLD.
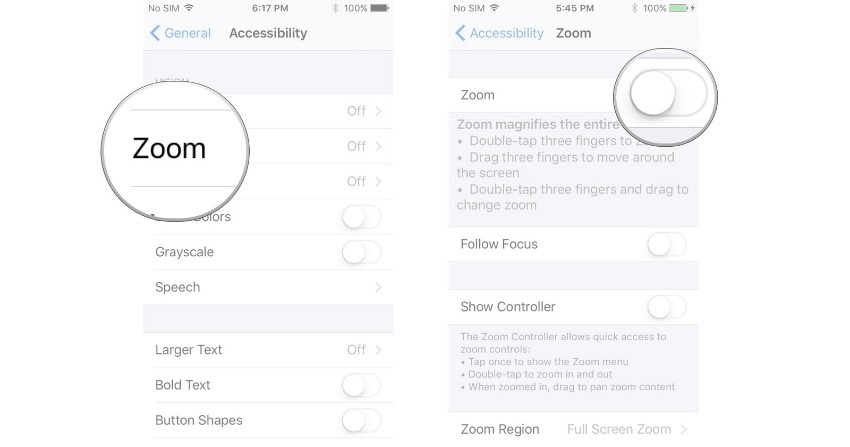
Zoom:
Zoom is a built in magnifier that works wherever you are in iOS and can magnify your iOS device screen up to 500 percent. Within the Zoom setting you can find a lot of additional options which you can adjust to suit your preference.
With Zoom enabled, you can use these touch gestures to control the amount of magnification that will best suit your needs.
Double tap using three fingers to zoom in and out. Drag three fingers around the screen to move from one area to another. Use one or two fingers to scroll in the particular section that is on the screen.
Magnifier:
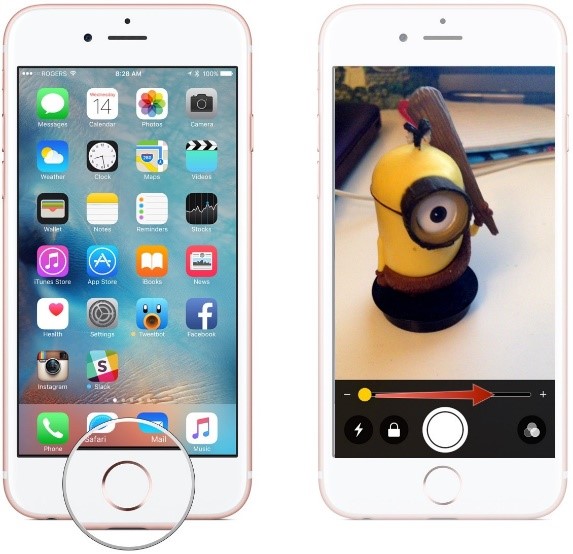
The magnifier is a visual accessibility feature that turns your iPhone into a magnifying glass. When enabled the magnifier lets you use your device’s camera’s to quickly magnify things. Once enabled, you triple press the home button to activate the magnifier. You can also turn Auto- Brightness on. This is found within this setting and this feature changes the brightness of the screen based on the available light.
Colours and greyscale:
Many individuals with low vision find it much easier to read light text on a dark background instead of dark text on a light background. Others find it more comfortable to view a screen where different colours have been replaced by varying shades of grey. Also if your battery is running low and you know that it will be a while before you’ll have the opportunity to charge it, grayscale can help extend battery life.
Increase Contrast:
If a higher contrast or a lack of colour helps you see better on the screen, you can adjust colours to assist.
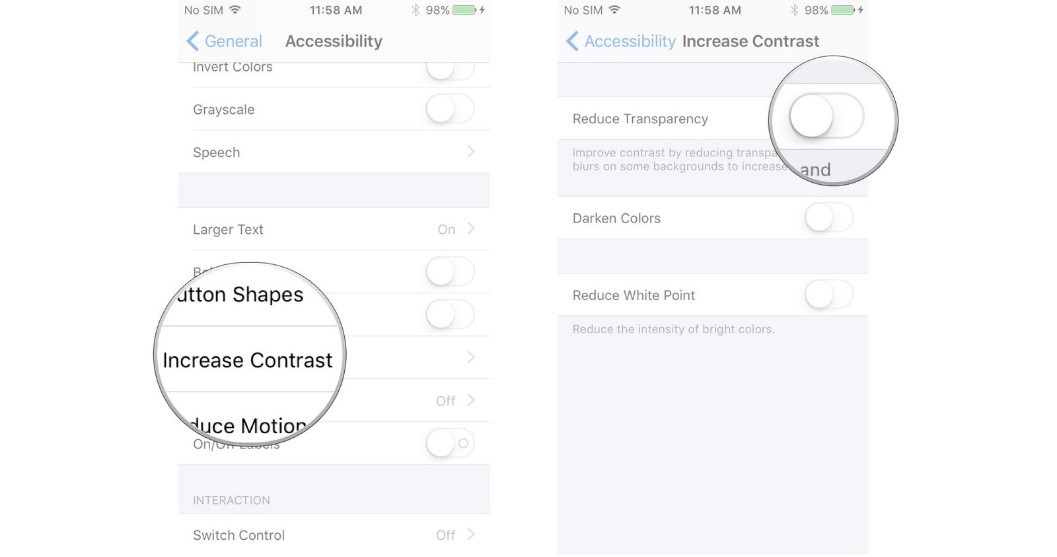
Reduce Transparency:
Reducing transparency eliminates most of the translucent effects iOS uses for display and makes the background more opaque.
Speech:
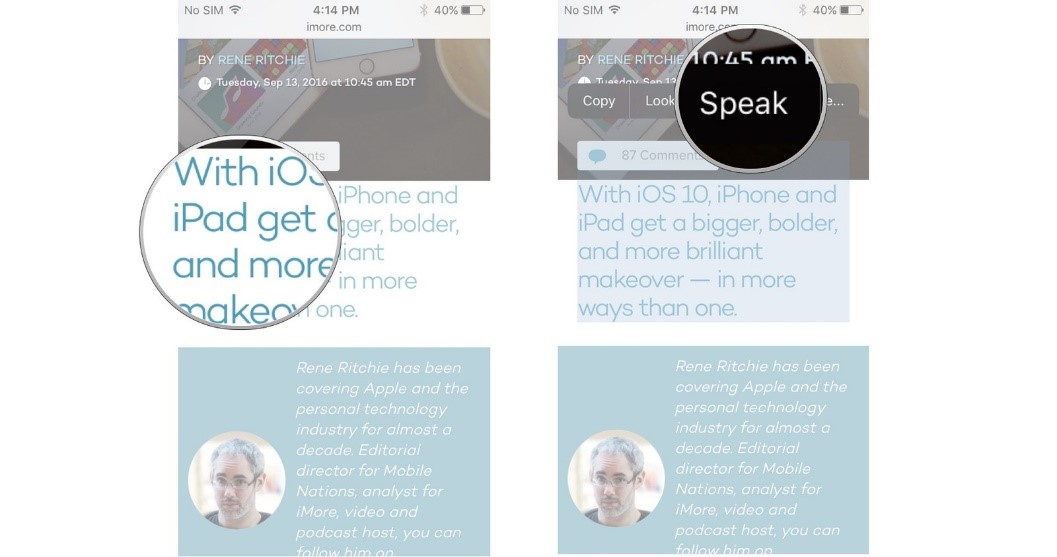
If you have a hard time reading the text on your iOS device, you can use the speech setting to change how and when your device will speak text. You can also can further customise the speed at which your iPhone reads the text and the dialect it uses.
If you select the “speak selection” which is found in your settings, for example, Go to settings > Select General > Select Accessibility > Select Speech. Once speech is selected you then need to hold your finger down on the text you’d like it to read and this pulls up the copy/paste menu. Then highlight the text and in the text edit pop-up, select “Speak”. Your iPhone will now speak the text back to you. If you wish the phone to read all text displayed on the screen, select “speak screen” in your speech settings and then swipe down using two fingers from the top of the screen to hear the content of the screen, or just ask Siri to Speak Screen and have all the content on the page read back to you.
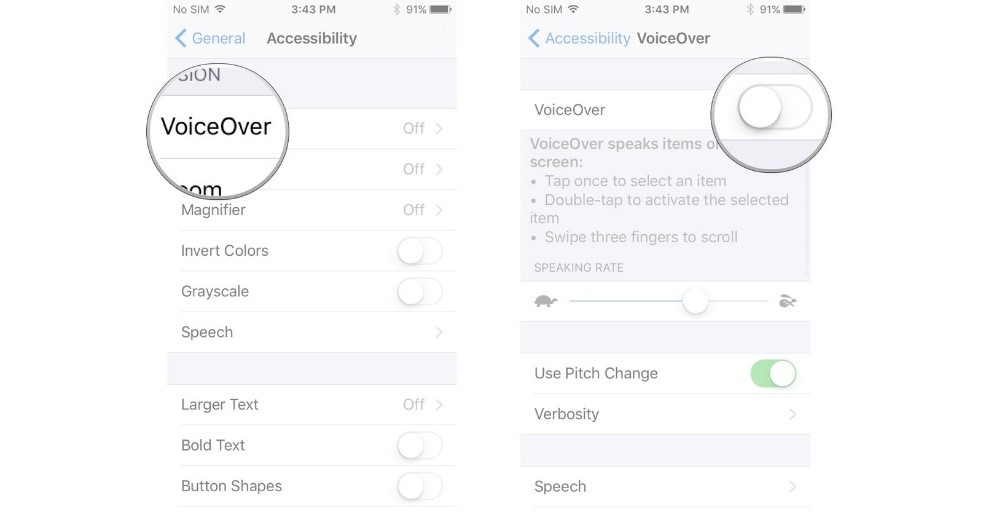
Voice Over:
This is a gesture-based screen reader that lets you access the device even if you can’t see the screen. Voice over is integrated in iOS, so it works with all the built in iPhone apps. The voice over allows you to hear a description of everything that is happening on your screen, simply from touching different locations and you are able to adjust speaking rate and pitch to suit you.
Touch or drag your finger around the screen and Voice Over tells you what’s there. Tap a button to hear a description, then double – tap to select. To scroll, flick left and right to move up or down the page.
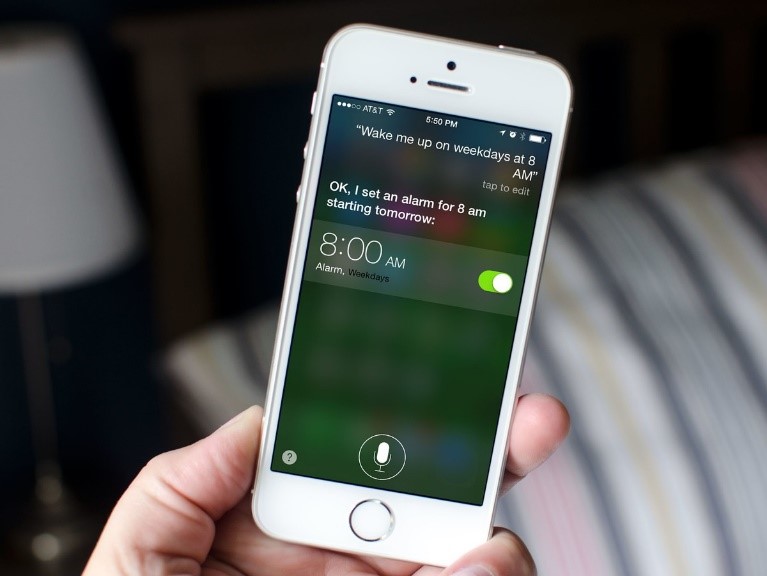
Microphone dictation and Siri:
A couple of other options, which are not located in the settings menu, are the microphone and Siri. The microphone is found on the keyboard and is the microphone button. Once pressed the iOS software will convert your speech to text, or alternatively you could use Siri which is Apple’s virtual personal assistant on iOS devices. Siri can be used for a long list of tasks, such as asking Siri to make a phone call, send a message, download an app, set an alarm, make an event in your calendar, get directions, check the weather, change device settings, speak screen and much more. All you need to do is instruct Siri and Siri will perform the task for you.
We hope you find this information helpful.
To download this tip of the month as a PDF, click here.
By Zoe Ronald 30/10/2018
Images sourced from https://www.imore.com
The Apple operating system, known as iOS, provides a complete suite of accessibility features for users with visual impairments. In this guide, we can show you what is possible with these devices to help support visual difficulties and teach you the basics.
To access these features you need to do the following:
1. Open the settings menu by selecting the settings icon on your device’s home screen.
2. Select General
3. Select Accessibility
4. At the top of the Accessibility setting you will find the Vision setting.
Within this setting, you have access to the following features listed below. Depending on what model or Apple device you are using, some features may not be available.
Font Adjustments:
Within this setting you are able to adjust the Size of your text, or make it BOLD.
Zoom:
Zoom is a built in magnifier that works wherever you are in iOS and can magnify your iOS device screen up to 500 percent. Within the Zoom setting you can find a lot of additional options which you can adjust to suit your preference.
With Zoom enabled, you can use these touch gestures to control the amount of magnification that will best suit your needs.
Double tap using three fingers to zoom in and out. Drag three fingers around the screen to move from one area to another. Use one or two fingers to scroll in the particular section that is on the screen.
Magnifier:
The magnifier is a visual accessibility feature that turns your iPhone into a magnifying glass. When enabled the magnifier lets you use your device’s camera’s to quickly magnify things. Once enabled, you triple press the home button to activate the magnifier. You can also turn Auto- Brightness on. This is found within this setting and this feature changes the brightness of the screen based on the available light.
Colours and greyscale:
Many individuals with low vision find it much easier to read light text on a dark background instead of dark text on a light background. Others find it more comfortable to view a screen where different colours have been replaced by varying shades of grey. Also if your battery is running low and you know that it will be a while before you’ll have the opportunity to charge it, grayscale can help extend battery life.
Increase Contrast:
If a higher contrast or a lack of colour helps you see better on the screen, you can adjust colours to assist.
Reduce Transparency:
Reducing transparency eliminates most of the translucent effects iOS uses for display and makes the background more opaque.
Speech:
If you have a hard time reading the text on your iOS device, you can use the speech setting to change how and when your device will speak text. You can also can further customise the speed at which your iPhone reads the text and the dialect it uses.
If you select the “speak selection” which is found in your settings, for example, Go to settings > Select General > Select Accessibility > Select Speech. Once speech is selected you then need to hold your finger down on the text you’d like it to read and this pulls up the copy/paste menu. Then highlight the text and in the text edit pop-up, select “Speak”. Your iPhone will now speak the text back to you. If you wish the phone to read all text displayed on the screen, select “speak screen” in your speech settings and then swipe down using two fingers from the top of the screen to hear the content of the screen, or just ask Siri to Speak Screen and have all the content on the page read back to you.
Voice Over:
This is a gesture-based screen reader that lets you access the device even if you can’t see the screen. Voice over is integrated in iOS, so it works with all the built in iPhone apps. The voice over allows you to hear a description of everything that is happening on your screen, simply from touching different locations and you are able to adjust speaking rate and pitch to suit you.
Touch or drag your finger around the screen and Voice Over tells you what’s there. Tap a button to hear a description, then double – tap to select. To scroll, flick left and right to move up or down the page.
Microphone dictation and Siri:
A couple of other options, which are not located in the settings menu, are the microphone and Siri. The microphone is found on the keyboard and is the microphone button. Once pressed the iOS software will convert your speech to text, or alternatively you could use Siri which is Apple’s virtual personal assistant on iOS devices. Siri can be used for a long list of tasks, such as asking Siri to make a phone call, send a message, download an app, set an alarm, make an event in your calendar, get directions, check the weather, change device settings, speak screen and much more. All you need to do is instruct Siri and Siri will perform the task for you.
We hope you find this information helpful.
To download this tip of the month as a PDF, click here.
By Zoe Ronald 30/10/2018
Images sourced from https://www.imore.com